Tools
This section will detail the features, configurations and customizations that are possible to be made according to the iDSecure operator's need.
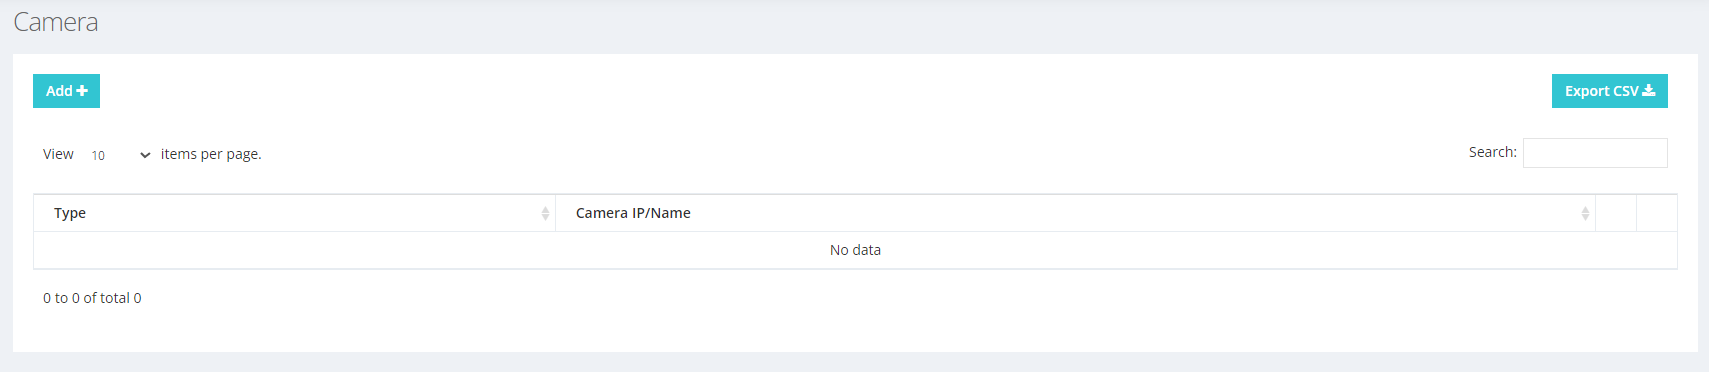
Cameras
This functionality allows the integration of cameras with access terminal events. It is possible to link an external camera to obtain pictures during the following access events: access granted, access denied, unidentified user, and alarm triggered.
To add a new camera just click the add button, which can be seen in the top left corner of the figure below:
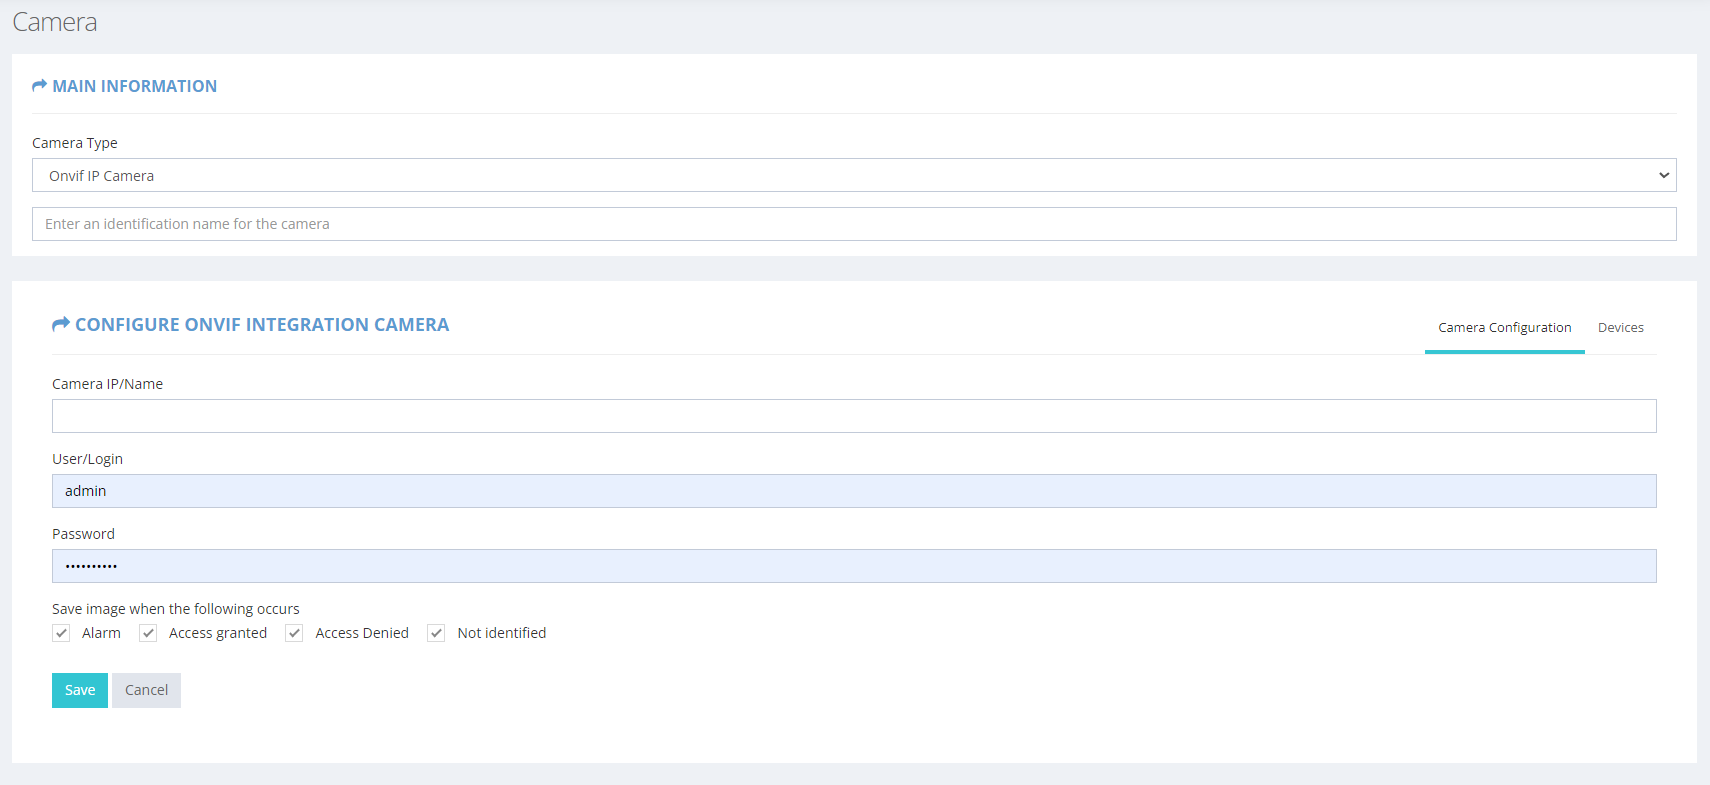
On the page that will open, you must enter the camera credentials in order to correctly enable the integration. You can also select which devices will be being integrated with the camera. This can be done by clicking on the "Devices" tab, as seen in the screenshot below.
Settings
The settings page covers various options for setting how iDSecure operates. For this reason, the settings are separated into sections arranged in different tabs, these are: General, Access, Guest Screen, Email, QR-Code Email, QR-Code Printer, Card Printer, Import, and Customizable Fields. To switch from one configuration section to another, simply click on the desired tab. The content of all of these is explained below:
General
Here you can adjust, as needed, the iDsecure's wider settings. In the first screenshot of this section (shown in the sequence) we have the Card, New people registration Language, Database and Retention Days settings.
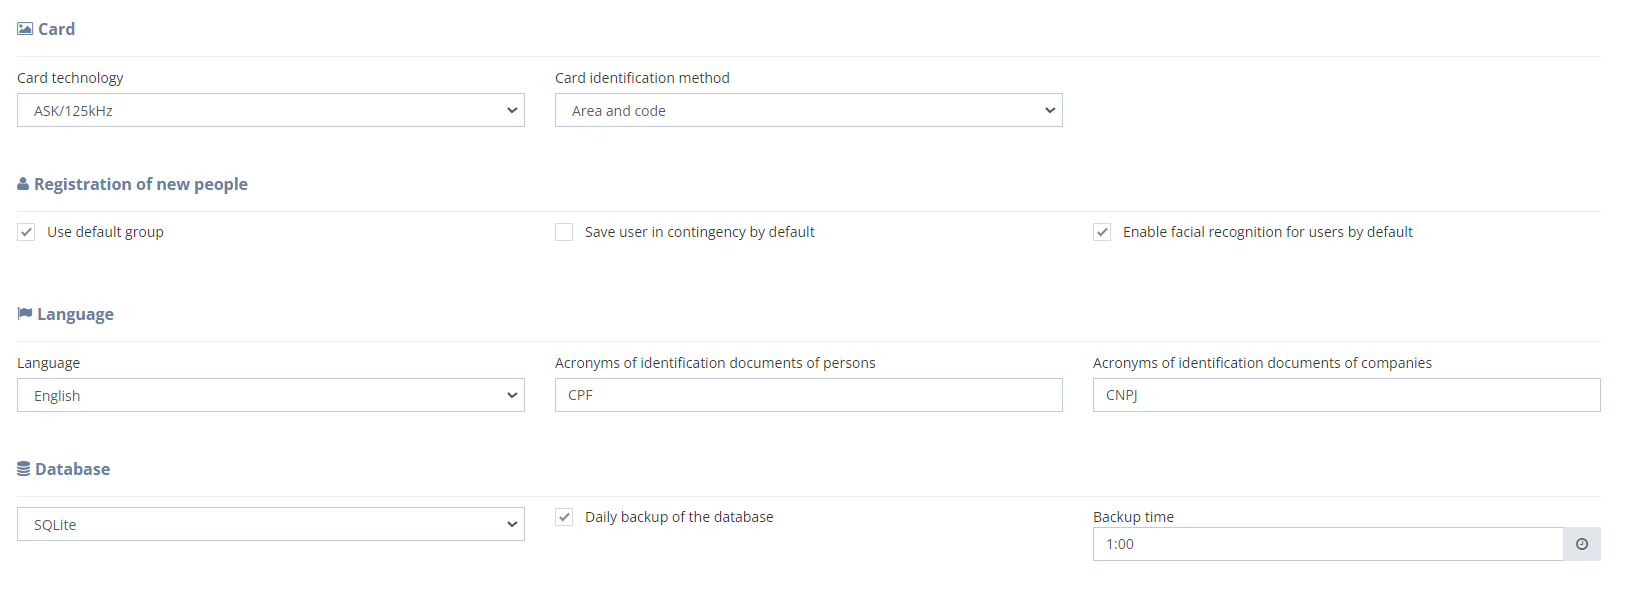
- Card
We have the option to choose the technology (ASK or Mifare) and the type of card identification, the options of which vary according to the technology chosen.
- Registration of new people
You can define whether it will automatically be in the default department, whether the user will be saved in contingency by default, and whether facial recognition should be enabled by default.
- Language
The language options are: Portuguese, English and Spanish. In addition, you can change the abbreviation for people's identification documents (default is "CPF") and the abbreviation for companies' identification documents (default is "CNPJ").
- Database
The database options that can be used are: SQLite, MySQL and MS-SQL 2014 or higher. You can set whether the database backup will be daily and the time of the backup.
- Retention Days
In this part you have to adjust the retention days for the log files. Similarly you can adjust the retention time for the database backup files. (the default retention time is 15 days)
On the continuation page, shown below, there are more configuration options: Parking Space Control, Exception Modes, iDSecure SaaS and Master Password for equipment.
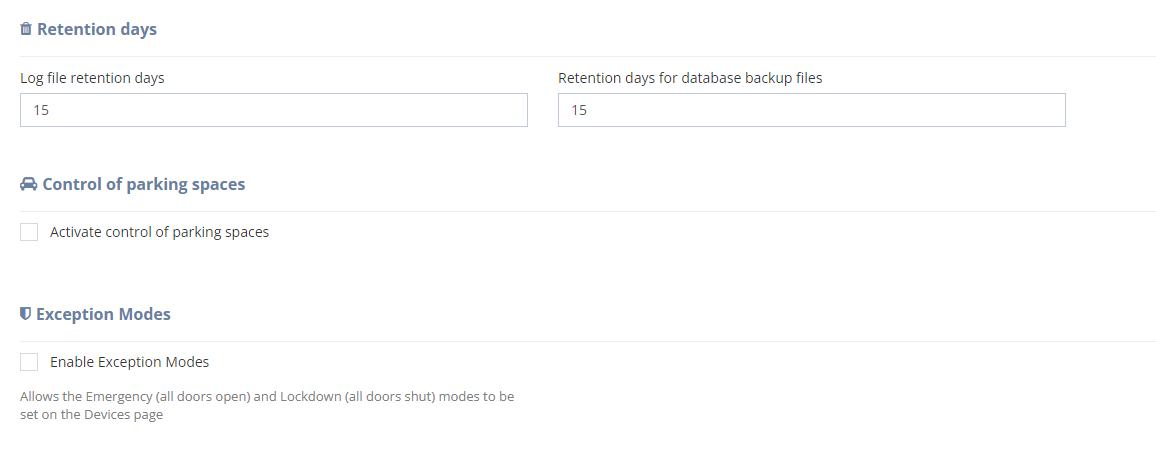
- Parking Space Control
Enables or disables parking space control.
- Exception Modes
Enables or disables exception mode, which allows you to activate Emergency (all doors open) or Locked (all doors locked) modes on the device screen.
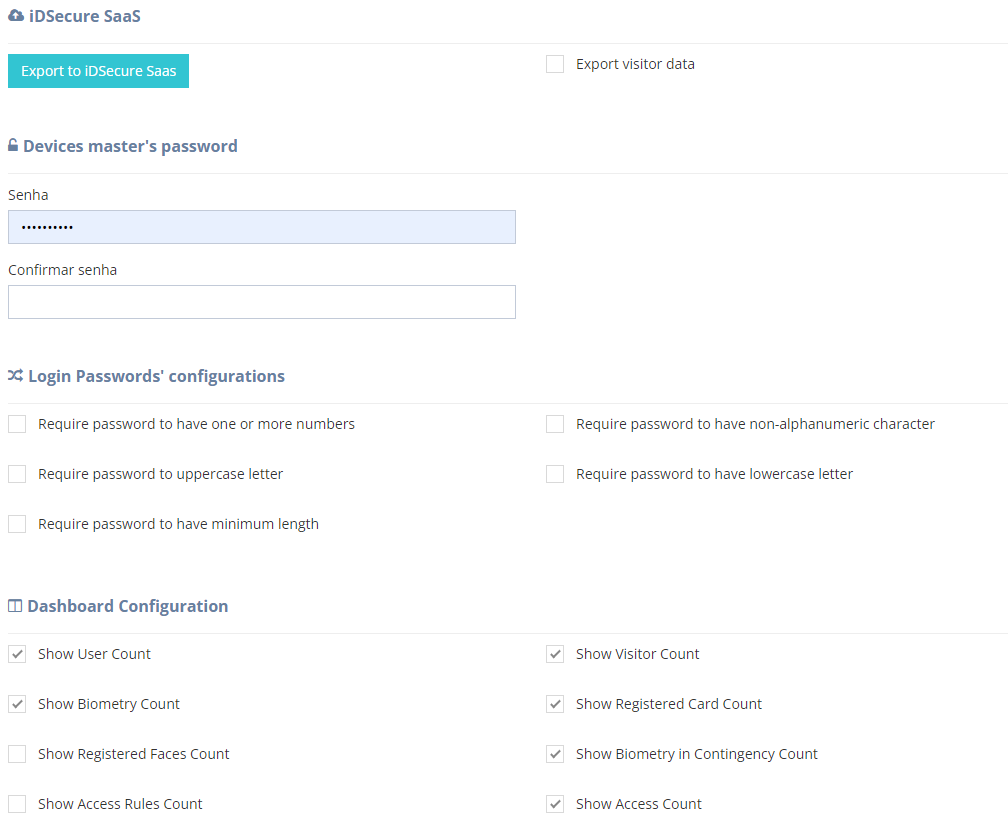
- iDSecure SaaS
Performs export to iDSecure Saas (Software as a Service).
- Equipment Master Password
Defines a master password for the equipment.
Finally, in the last part of the general settings are the Login Passwords and Dashboard Settings settings:
After making the desired changes, to apply them simply click the "Save" button at the bottom of the page.
Access
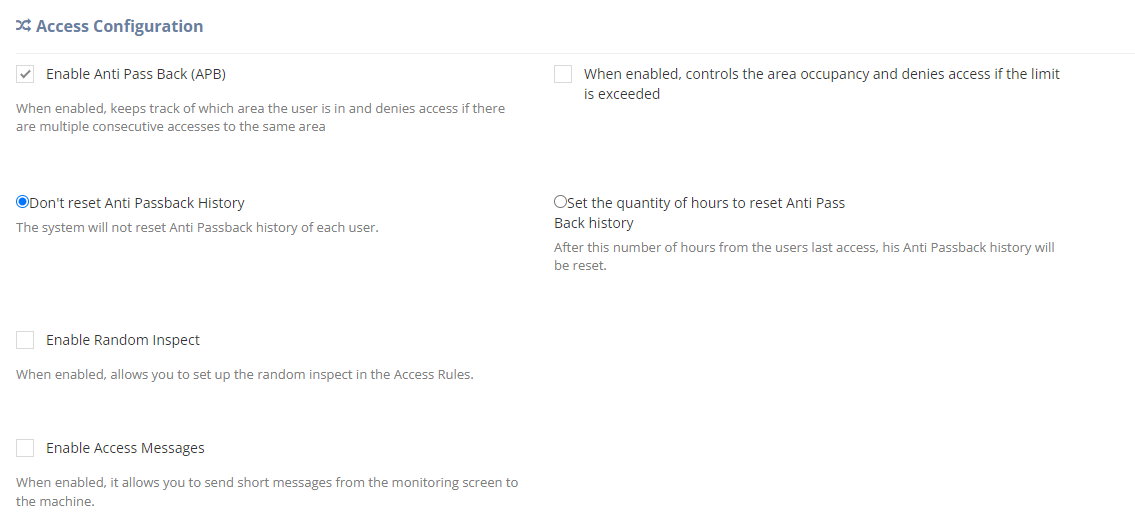
The following settings allow you to adjust the settings related to people access. Most of them are up to the operator to define whether or not to enable the feature. Some of the possible settings are: enabling of anti-dual entry, random search couponing control, resetting anti-dual entry history and setting the number of hours to reset the double check-in history to zero.
Next, shown in the screenshot below, are more access settings: Enable credit control, monetary values for credit, manual authorization escort configuration, access methods and double vehicle verification.
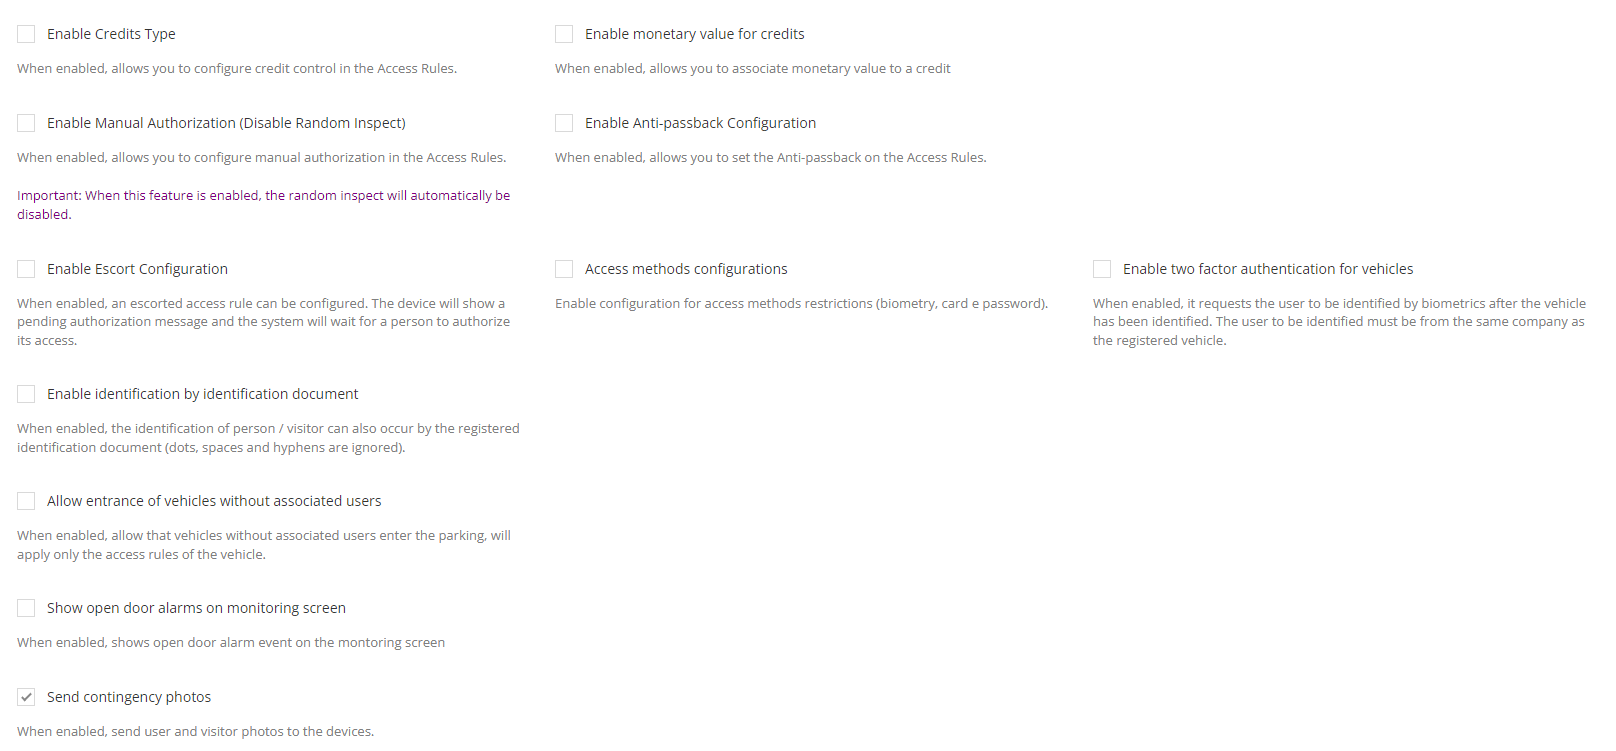
To conclude, the last access configuration options are shown below. They are: mandatory filling of CPF, validate CPF, enabling identification by CPF, allowing the entry of vehicles not linked to users, sending contingency photos and displaying alarms of open door alarms on the monitoring screen.
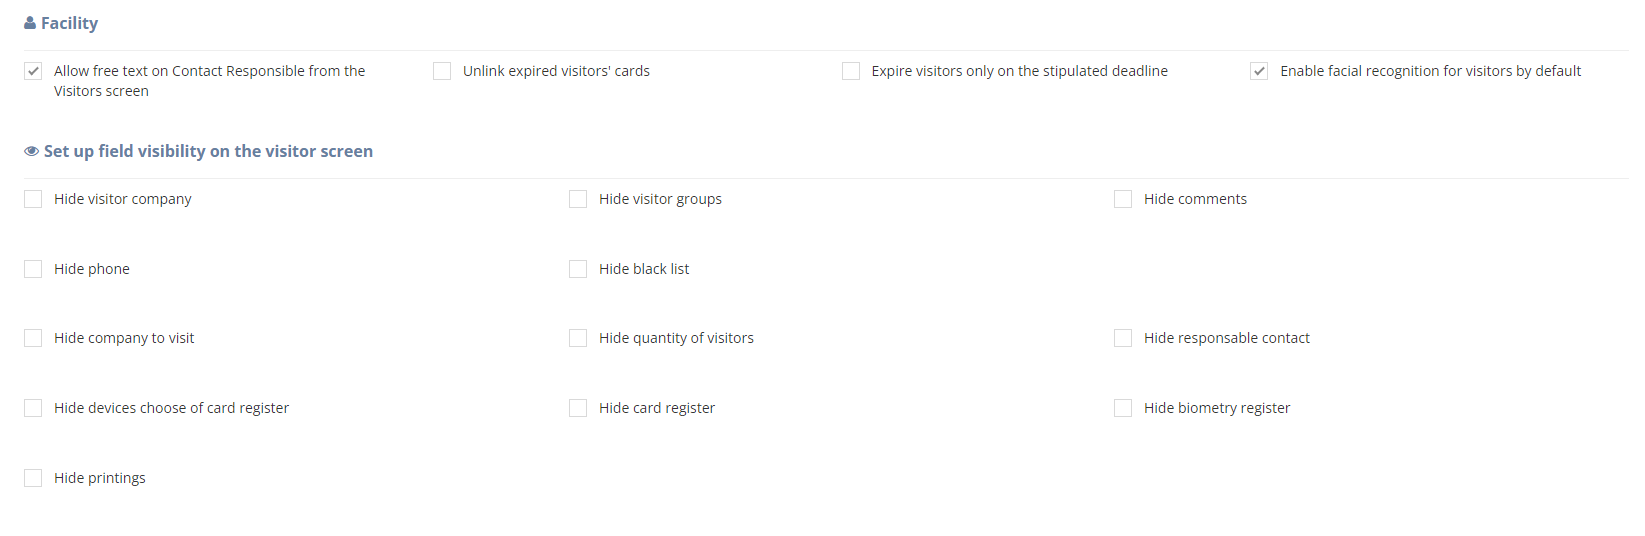
Visitor Screen
The visitor screen settings allow you to customize the visitor screen as needed. You can adjust the visibility of certain fields on the such as: phone number, visitor group, visitor's company, remarks, etc. The following image shows all possible options:
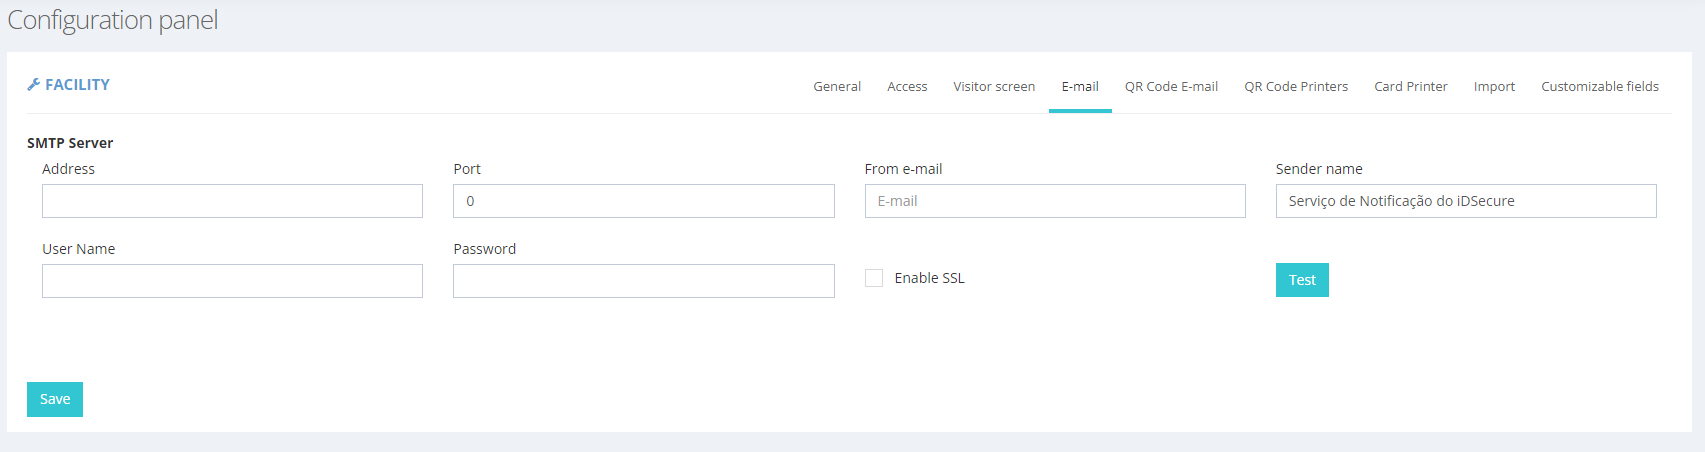
The email settings allow you to define the email credentials to which iDSecure notifications will be forwarded.
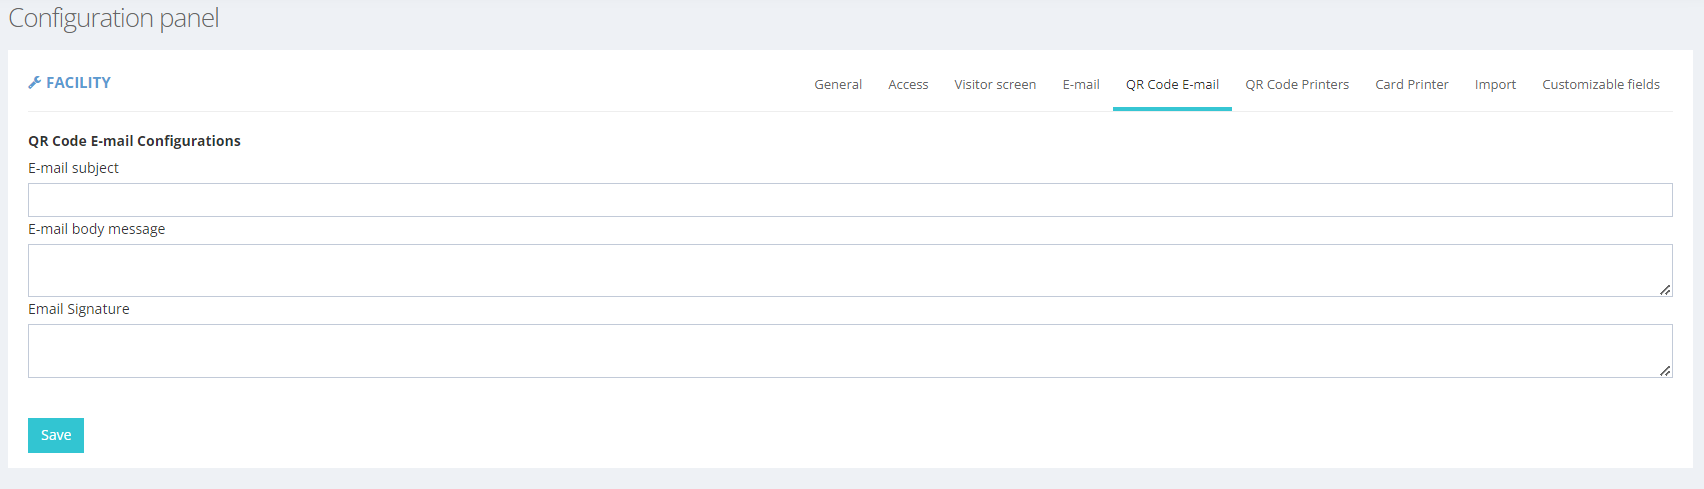
QR Code E-mail
The email settings allow you to define the body of the email linked to the QR-Code that will be forwarded to.
QR Code Printer
iDSecure has the functionality to generate files for QR-code printing. To do this, you simply add a printer on the QR-Code printer settings page, see below. It is important to note that for this printing you need a printer that prints ESC-POS format files. ControliD has the PrintiD Touch, which can be used for these prints.

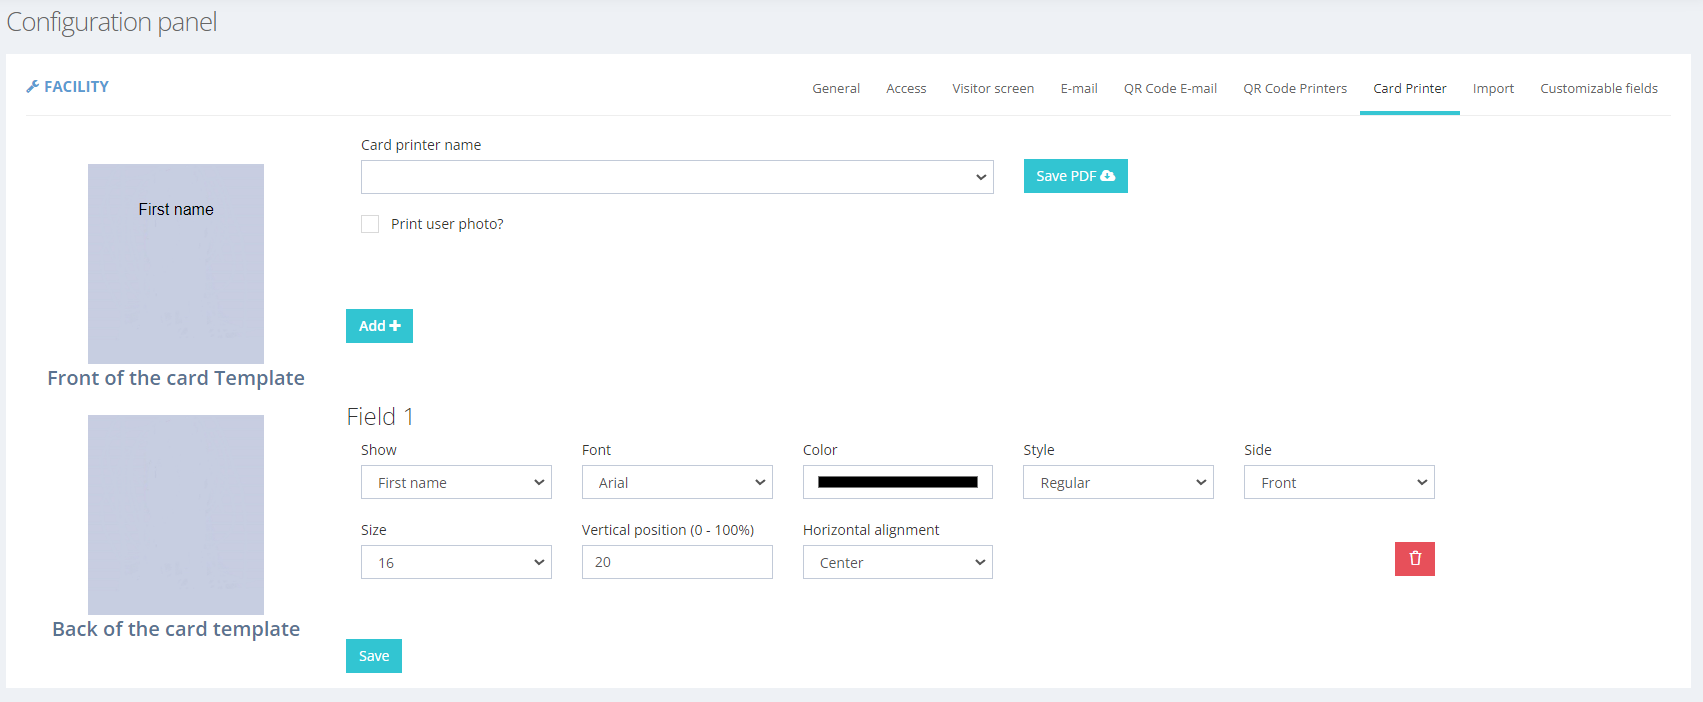
Card Printing
iDSecure has the functionality to generate files for card printing. To do this, you simply add a printer on the card printer settings page, seen below. It is important to note that a Datacard SD360 printer is required for card printing.
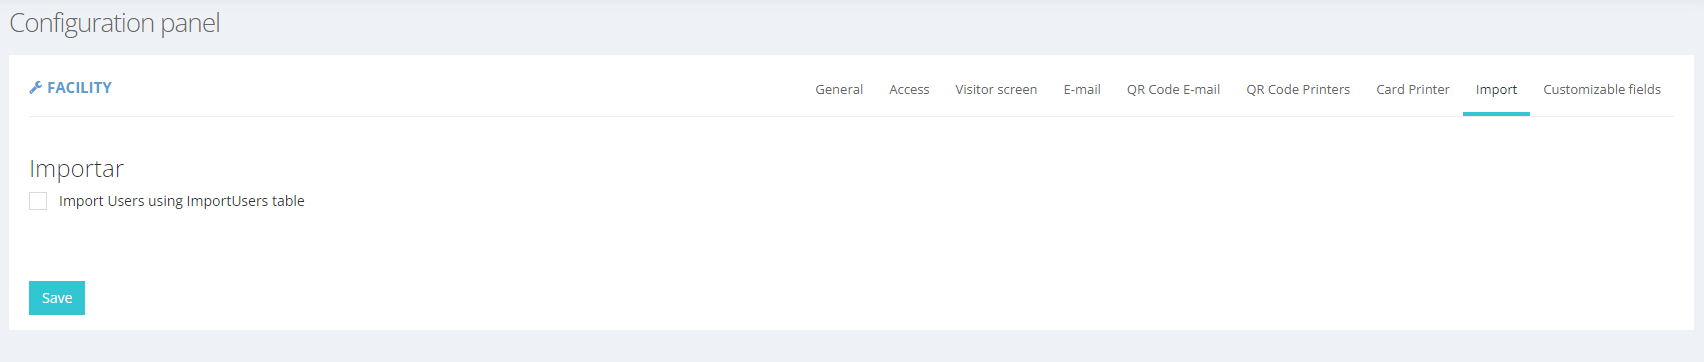
Import
This setting allows you to automatically import people using the ImportUsers table.
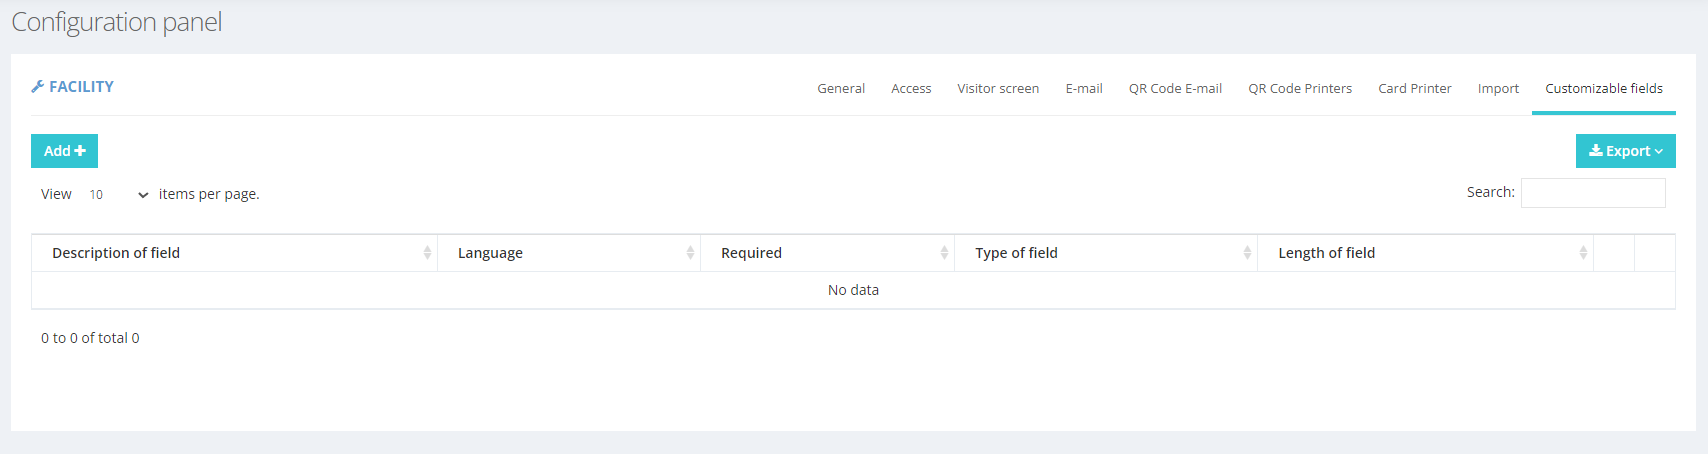
Customizable Fields
This setting allows you to create and modify new fields for table columns that can be used in reports.
Send Data
By clicking on this feature, iDSecure allows you to automatically send your data to the desired devices. This function has the effect of synchronizing the changes made in iDSecure to the devices.
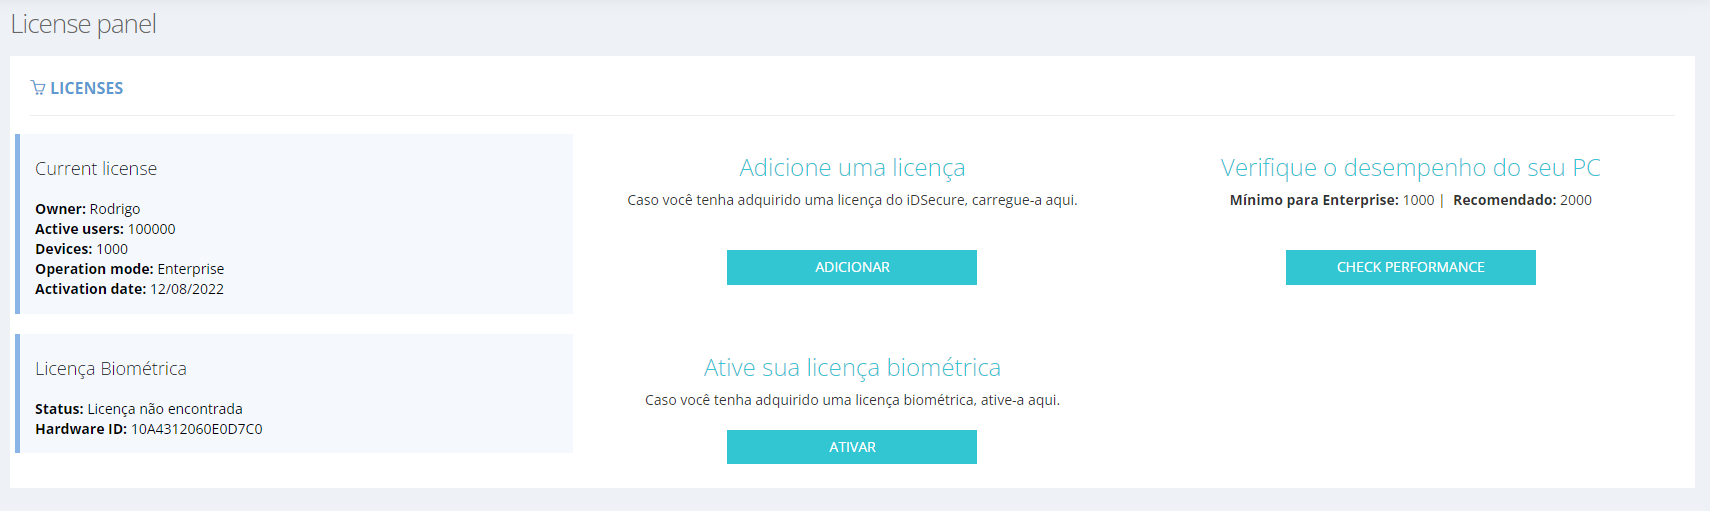
Licenses
On this page you can check your current iDSecure and biometric license. In addition, if desired, you can add a license and also check the PC's performance
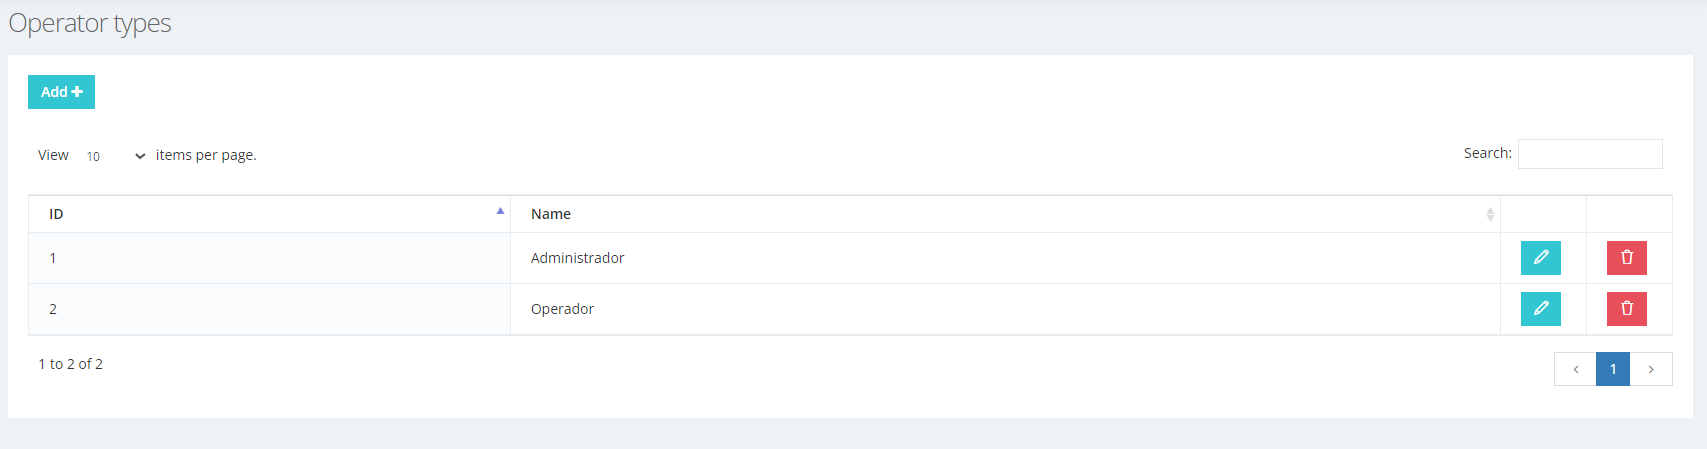
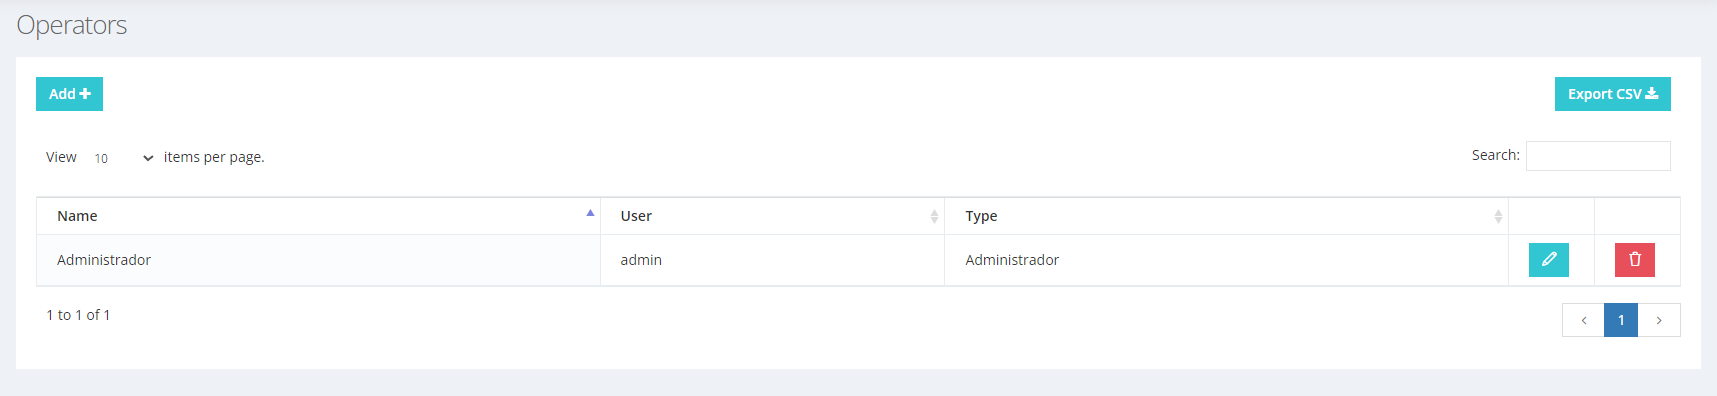
Operators
The operators are the users that use iDSecure. In this section you can define the name, user and type of operator.
Operator Profiles
You can create several operator profiles, which are included in the operator type mentioned above. By default we have only administrator and operator, but you can add many others.